I am learning about 3D printer parts the hard way. A couple days ago, I was printing an object that required the Bowden extruder on my Creality Ender-3 V2 Neo to repeatedly extrude and retract the filament. This resulted in grinding and stripping my filament and ultimately a failed print. Failed prints will happen from time to time, so that wasn’t a big deal. However, as I tried to remove the filament from the extruder, the filament broke, and the only way I could remove the filament was to disassemble the tubing that connected the Bowden extruder to the nozzle (a.k.a. “hot end”). It was the first time I had to remove the tubing, and I was able to extract the filament. The following video may be helpful if you are not familiar with the process:
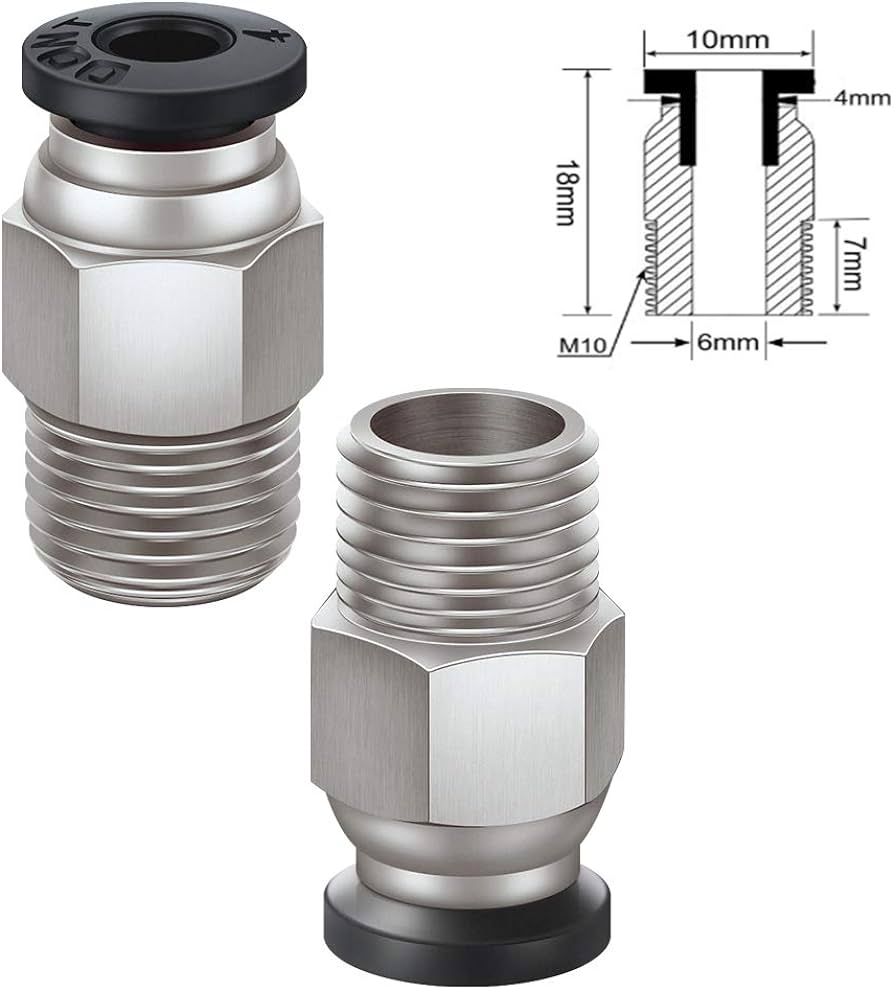
Mission accomplished, right? Wrong. While removing the tubing, I slid the pneumatic quick coupler (specifically, a PC4-M10 fitting) downstream (i.e., away from the extruder and toward the nozzle). To replace the tubing, I tried to slide the coupler back to its original position, but it would not budge. Since the tubing was smooth and slippery, I used all sorts of techniques to get a better grip on the tubing, but to no avail. Since I was unfamiliar with this particular kind of coupler, I did not know that it was self-locking in the upstream direction. After researching 3D printer parts, I finally inferred (but didn’t read anything that explicitly stated) that I had to press the quick release to allow the coupler to slide smoothly in both directions along the tubing.
I’ve written previously about how 3D printing is becoming more mainstream (here and here) because of improved functionality and more affordable prices, but I think users still need to be slightly tech-savvy and have a little bit of aptitude for building/making things. So in hopes of helping other novices like me, I’d just like to say that if you ever need to disconnect the tubing, you should familiarize yourself with how your coupler works!