Monday, August 31, 2020

Overprotective uBlock for Safari

I’ve used uBlock for Safari for many years to block ads, popups, and trackers on my Mac. In fact, I’ve also installed uBlock for Chrome and Firefox for both Mac and Windows. I recall noticing a reduction in ads and popup windows upon installation, and that has been my new baseline browsing experience for quite a while.


Recently I was trying to visit the Centers for Disease Control and Prevention (CDC) Public Health Information Network Vocabulary Access and Distribution System (PHIN VADS) website at https://phinvads.cdc.gov/. Strangely, I was able to visit PHIN VADS on every browser except for Safari on my Mac, where I would receive the following error message:

When trying to troubleshoot, I attempted some of the tips in the If you can’t open a website in Safari on Mac Apple Support page. This included the last suggestion to click and hold the Reload button, then choose Reload Without Content Blockers (also pictured above). However, I was still unable to visit PHIN VADS using Safari. Since the CDC is a federal agency, it is highly unlikely that there would be any nefarious content on the website that would warrant blocking it entirely.

It wasn’t until I disabled the uBlock extension entirely that Safari would let me visit the PHIN VADS website. I then verified that I could re-enable the uBlock extension and simply click “Allow ads on this site” while on PHIN VADS to whitelist the site. So it seems that uBlock not only blocks ads, popups, and trackers, in some cases it entirely prevents visitation of certain websites. Furthermore, reloading a page in Safari without content blockers fails to bypass uBlock. I’m not sure why uBlock is so overprotective in some cases, but if you use it, just remember to try whitelisting a website if it fails to load.

Sunday, August 30, 2020

California’s Blueprint for a Safer Economy

On August 28, California governor Gavin Newsom announced the launch of Blueprint for a Safer Economy, a website that provides county-specific criteria for loosening and tightening restrictions on activities across the state of California. Search for your county and/or activity here.

Activities range from appliance repair shops to zoos and all other kinds of activities and businesses in between. The Blueprint for a Safer Economy is administered by the California Department of Public Health which replaced its previous “watch list” system of tracking COVID-19 trends with a four-tier, color coded classification system. 


Rules for moving through the tiers include:
  1. CDPH will assess indicators weekly. The first weekly assessment will be released on September 8, 2020.
  2. A county will remain in a tier for a minimum of three weeks before being able to advance to a later tier.
  3. A county can only move forward one tier at a time, even if metrics qualify for a more advanced tier.
  4. If a county's case rate and test positivity measure fall into two different tiers, the county will be assigned to the more restrictive tier.
  5. City local health jurisdiction (LHJ) data will be included in overall metrics, and city LHJs will be assigned the same tier as the surrounding county.
More information about moving through the tiers is available here. If you just want a simple overview, check out the ABC 7 News Reopening Tracker which summarizes all county tiers based on the Blueprint data.

Apple Celebrates Our National Parks

August 25, The U.S. National Park Service (NPS) celebrated its 104th birthday. The NPS is an agency of the federal government that manages all national parks, many national monuments, and other conservation and historical properties with various title designations. It cares for special places saved by the American people so that all may experience our heritage. Here’s a map of all current NPS units:


Apple announced several ways of celebrating. First, it will donate $10 to the National Park Foundation for each Apple Pay purchase made at Apple between August 24 and 30. Second, the Apple TV app will feature a national parks highlight on the Watch Now page, including “Aerial America” from the Smithsonian Channel, along with other relevant shows and movies that explore and celebrate the natural world. Third, Apple Music will feature its updated Nature Awaits playlist, so even if users can’t make it out to the parks, they can hit play and let their imaginations wander.

Finally, on August 30 only, Apple Watch users around the world can celebrate with an Activity Challenge inspired by national parks. To participate, they can record a hike, walk, run, or wheelchair workout of a mile or more to earn an Activity award and animated stickers for Messages. In case you didn’t earn your activity award and animated sticker and want to see them, here they are:


Happy birthday NPS!

Saturday, August 29, 2020

School COVID-19 Tracker

Necessity is the mother of invention. According to an article in NPR, a teacher in Kansas, Alisha Morris, was unable to find data about COVID-19 cases in U.S. schools, so she started collecting data from local news reports and aggregated her findings in a spreadsheet. She later shared her data with colleagues and her district board of education. One thing led to another, and she eventually handed over her project to the National Education Association where Morris and other volunteers are crowdsourcing data.


Data are also presented in Tableau in both map and tabular format.


Kudos to Alisha Morris and all the volunteers—I hope this effort helps inform local policy and decision-making.

Amazon Photo on Delivery

Yesterday I received a shipment that I ordered from Amazon. Like most of my shipments, this one arrived on time and was accompanied by emails and text messages to notify me of package shipment and delivery. However, unlike all other Amazon deliveries I’ve received in the past, the final email notification of package delivery was accompanied by a photo:

Interesting… I wondered why they felt the need to take a photo. I didn’t think that it would help prevent package theft which has been a problem for many customers. That problem was more directly addressed by Amazon’s acquisition of Ring.

An article in USA Today states that the photo “helps with a common customer pain point when getting deliveries at home — finding where a package was left while they're at work, especially if it was tucked behind a bush or flower pot to make it less visible to would-be thieves.” Although it had never crossed my mind that it would be useful to see a photo of where my package had been left, I guess that makes sense. I live in a 10-unit complex, and even though the above photo represents the entirety of my front entrance, packages are sometimes left near the mailboxes. That being said, I’ve personally never had difficulty finding a package because there simply aren’t many obvious places to look for them. Perhaps it’s been more useful to folks who live in single-family homes and who have plants or other objects behind which packages can be hidden.

The USA Today article also states, “The service is only active with packages delivered via Amazon’s Amazon Logistics delivery system, which include Amazon Delivery Service Providers and Amazon Flex drivers.” I could not determine from the shipping label or other package markings which service was used to deliver my package. The package tracking feature in Amazon did not provide a USPS, UPS, or other tracking number. It simply stated, “Delivery by Amazon” so I assume it was one of the options mentioned above.

According to the customer service page for Amazon Photo on Delivery, “Amazon may take a photo on delivery when a package is left unattended. Capturing delivery photos is intended to help customers see that their package was safely delivered and where. The photo will focus on the placement of the package. If a photo on delivery is captured, it may show up when you track a package from Your Orders.” Customers can also opt out of Photo on Delivery by contacting Customer Service.

Friday, August 28, 2020

Adventures with School Technology

My daughter started the 2020-2021 academic year within the Los Angeles Unified School District (LAUSD). Given the pandemic, LAUSD announced on July 13 that it would begin the new school year with 100% virtual learning. To ensure that all students have access to the same online learning applications, LAUSD issued brand new Apple iPads (7th generation, Model Number MW752LL/A) to all students, along with a power adapter and lightning to USB cable. Awesome! Now my daughter has her own iPad that she does not need to share with the family. We will need to return the iPad upon graduation, but I was very pleased to hear that LAUSD was able to get the funding to procure so many iPads for the largest public school district in California and the 2nd largest public schools system in the United States.

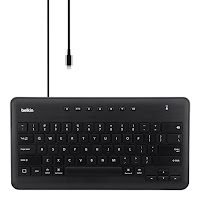
Some parents expressed concern about the choice of iPads instead of Chromebooks which many feel are better for typing. However, LAUSD thought about that and offered keyboards (Belkin wired keyboard, Model B2B115) to all students as well. Awesome! For typing longer messages or reports, my daughter has a keyboard that she can simply plug in to her iPad when needed. We actually have a wireless keyboard, but it seems like every time we need to use it, the batteries are dead, and it takes several hours to recharge them. One minor downside of the plugin keyboard is that it connects to the iPad using the same lightning bolt slot as the charger, so you cannot type and charge at the same time. Perhaps there is a way to split the line, but I don’t think we’ll really need that option at this time.

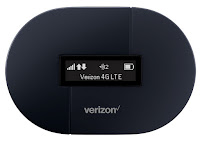
Finally, all families were offered a wireless hotspot (Verizon Ellipsis Jetpack MHS900L) to ensure that every child has internet connectivity. Awesome! While we do have Spectrum cable internet at home, the basic plan has sufficed until recently when we seem to have maxed out on bandwidth on several occasions which has resulted in choppy web conferences for my daughter—this is because I set my work computer to high priority through our router. Now my daughter has a fallback option if we find ourselves competing for bandwidth.

Not surprisingly, the start of the new school year involved a few bumps in the road. Our first technical issue was with joining school Zoom sessions. My daughter was given instructions to login to her Schoology account, navigate to her class, find the Zoom link, and click on it join her teacher and classmates on Zoom. She was able to find the Zoom links, but she was unable to initiate Zoom. I discovered that her LAUSD-issued iPad did not have Zoom installed on it. Easy fix, right? I’ll just download it from the Apple App Store and we’ll be on our merry way. Not so fast—LAUSD has applied mobile device management (MDM) which imposes restrictions on what you can do with the iPad. One of those restrictions is to not allow access to the Apple App Store. This is completely understandable, as many kids would otherwise immediately download TikTok, Instagram, Snapchat, and numerous other social media apps. But it left us completely unable to join Zoom for the first couple days until I was able to speak to someone at the LAUSD IT Help Desk. Apparently in lieu of the App Store, LAUSD has a dedicated website which can be accessed via a web clip called App Catalog. Through App Catalog, students may download a number of pre-approved apps including Microsoft Word/Excel/PowerPoint, Apple Pages/Numbers/Keynote, Google Docs/Sheets/Slides, Zoom, and many others.

The second technical issue we encountered was with the LAUSD virtual private network (VPN). VPN settings are another requirement imposed by LAUSD MDM. I assume that it allows LAUSD to monitor all web traffic and ensure that students don’t visit unsafe sites. It is also likely used to authenticate visitors to LAUSD-specific websites like the App Catalog site discussed above. Anyway, last night my daughter told me that she was unable to access the internet from her school iPad. With some basic troubleshooting, I was able to verify that our wireless internet connection was in fact working fine for our other devices at home, and that the issue was likely due to the LAUSD VPN. We went to bed last night hoping that the issue would be resolved before classes began on Friday. Unfortunately, my daughter and several of her classmates reported being completely unable to access the internet through their school iPads. This issue was resolved by the early afternoon.

The third technical issue was with the WiFi hotspot. While I am able to establish a connection with the correct WiFi name (SSID) using the password provided, I can’t seem to access the internet from the school iPad or my personal laptop. Users are supposed to be able to access settings and information at http://my.jetpack which is how you connect directly to the hotspot device’s router, but I can’t connect to that address either. It wasn’t until I found this page that I found an alternate address http://192.168.1.1 to connect to the Jetpack router. It seems like simply signing in to the router activated the hotspot (even though according the instructions this was not a necessary step to take), and now we’re in business.

So in summary, while we encountered many technical issues, we were also able to solve all of them. We are very appreciative of the resources and support that LAUSD has provided to us and all other families with school-age children. Hopefully if you’ve had similar issues, this information will help you solve them too.

Friday, August 21, 2020

Record Movies with QuickTime Player

Did you know that if you have a Mac running macOS High Sierra (10.13) or later, you already have a handy dandy application that allows you to record movies from your built-in camera, iPhone, iPad, and iPod touch? That application is called QuickTime Player, and it is capable of recording movies from a variety of sources. Simply launch QuickTime Player and then click File > New Movie Recording. If you click the Options menu (the down-pointing arrow immediately to the right of the Record button with the red dot), you’ll be able to specify the following settings:

Camera: If you have a built-in camera, it will likely be the default setting and will allow you to record yourself which can be useful for vlogging. However, if you have an iPhone, iPad, or iPod touch connected to your Mac, you should also be able to record whatever is displayed on screen for those devices, like this.

Microphone: This allows you to choose an audio input. For most users, it will default to the internal microphone, but if you have more than one available, you should see those choices too.

Quality: You can choose either High or Maximum. If recording a movie from your built-in camera, high quality means H.264 video and 44100 Hz AAC audio, whereas maximum quality means Apple ProRes 422 video and Linear PCM audio. If recording the screen on a mobile device, high quality means H.264 video and 44100 Hz AAC audio, whereas maximum quality means H.264 video and Linear PCM audio.

After specifying your movie settings, press the Record button to start recording. During recording, the Record button turns into a Stop button which you can obviously click to stop the recording. If you like the results, click File > Save to save your recording.

Interestingly, I was using a 3rd party USB to Lightning cable to connect my MacBook Pro to my iPhone, and although I have successfully charged my iPhone with that cable many times, QuickTime refused to display my iPhone as a camera input until I changed my cable to an official Apple Lightning cable.

Finally, if you want to just record audio without video, from QuickTime Player you can click File > New Audio Recording instead. It should come as no surprise that your settings will be limited to Microphone and Quality.t

Tuesday, August 18, 2020

GoPro Usability Issues

When I record videos with my GoPro HERO7 Black, I usually shoot at 2.7K resolution in a 16:9 aspect ratio and with “High Efficiency” format (more on this below). I like the 2.7K resolution because I usually make home movies in 1920x1080 resolution, and the extra pixels allow me to crop or rotate my original videos without having to upsample and lose video quality. Recently I was asked record videos of my daughter for her after-school drama class. Since their in-person performance was cancelled due to the coronavirus pandemic, they asked parents to upload videos to a Dropbox account so they could stitch together a virtual performance. Fantastic idea!

I decided to shoot with my GoPro because we were asked to provide full-body footage for the dances, we don’t have wide-open spaces in our home, and the GoPro captures wide angles (albeit with some fisheye effect which I can live with). I decided to change the video compression setting from “High Efficiency” (i.e., H.265) to “Most Compatible” (i.e., H.264) format. I thought that the person doing the video editing would most likely be able to handle the H.265 format, but I erred on the side of caution and made the switch to H.264 anyway, recognizing that my files would take up significantly more space.

After more than an hour of shooting multiple takes each of several dances and songs, my daughter reached the limits of her patience, and we called it a day. After transferring the video files to my computer in preparation to upload to Dropbox, I previewed one of them and gasped in horror. The videos were all in 4:3 aspect ratio and 1920x1440 resolution. What the heck happened? I discovered that it had to do with a usability issue in the GoPro iOS app:

If you can see from the video, the mere act of changing the video compression setting ALSO automatically resets the aspect ratio to 4:3 and resets the resolution to 1440. I could understand if the app automatically changed a setting if the user chose an impossible permutation. For example, let’s say that I was recording 1080p at 240fps, and then I changed the resolution to 4K. Since the GoPro HERO7 Black can only record 4K at up to 60fps, I would expect it to drop the frame rate from 240 to 60 when switching the resolution from 1080p to 4K. However, when changing the video compression setting, it is totally unnecessary to alter the resolution or aspect ratio. Furthermore, if the developers had to compromise on app functionality, at least they could have warned me that they automatically changed my aspect ratio and resolution settings so I could change them back. Very few people would have thought to double-check those settings, especially since the aspect ratio and resolution settings are ABOVE the video compression setting. So if you’re reading this, hopefully this will save you some grief.

In an effort to further help out other GoPro users, I decided to submit feedback to GoPro via GoPro’s Contact Us page. After filling out their form and pressing the “Request a Call” button, I received an error message: “Invalid Captcha. Please retry.” However, I was unable to retry because as you can see from the following screenshot, a Captcha image was nowhere to be found:

Ugh, another usability issue! Strike two. Fortunately GoPro did not strike out, as I was able to click the “Start Chat” button instead, and a live chat agent was able to receive my suggestions and supposedly pass it along. I also learned that a more appropriate place to submit feedback was through the Feedback page. Hopefully GoPro will be able to address the settings issue in a future release, but in the meantime just remember that after changing the video compression setting, you may want to scroll up and re-enter your desired aspect ratio and resolution settings.

Tuesday, August 11, 2020

Securely Erase Your Hard Drive

There are many reasons why you might need to securely erase your hard drive. If you are selling or recycling your computer or upgrading your hard drive, you don’t want your hard drive data getting into the wrong hands. Chances are that you have personal information on your hard drive that identity thieves and fraudsters would love to see. Here are some suggestions for how to securely erase the data from your hard drive.

SECURELY ERASING A MAC HARD DRIVE

First, boot your Mac from a volume other than the one you intend to erase. One common way to do this is to install a Mac operating system on an external hard drive or thumb drive. Read this article for easy step-by-step instructions on how to do that.

Next, run Apple’s Disk Utility application which comes with every Mac operating system. Select the hard drive you’d like to erase and press the “Erase” button.

From there, you can optionally click the “Security Options…” button to choose from one of several erasure methods:

  • Option 1 (Fastest): This option does not securely erase the files on the disk. A disk recovery application may be able to recover the files.
  • Option 2: This option writes a pass of random data and then a single pass of zeros over the entire disk. It erases the information used to access your files and writes over the data 2 times.
  • Option 3: This option is a DOE-compliant 3-pass secure erase. It writes two passes of random data followed by a single pass of known data over the entire disk. It erases the information used to access your files and writes over the data 3 times.
  • Option 4 (Most Secure): This option meets the US Department off Defense (DOD) 5220.22-M standard for securely erasing magnetic media. It erases the information used to access your files and writes over the data 7 times.

The best option for you depends on how critically important it is to wipe your data and how much time you are willing to spend erasing the data. Depending on the speed and capacity of your hard drive, it could take several days to erase your hard drive using the most secure method. There are also other commercial applications that you can purchase, and some of the offer a 35-pass overwrite option.

SECURELY ERASING A WINDOWS HARD DRIVE

Similar to a Mac, you need to boot into a Windows volume other than the one you want to erase. Read this article (https://www.pcmag.com/how-to/how-to-run-windows-10-from-a-usb-drive) for instructions on how to run Windows from a USB drive.

Next, decide which application you’ll use to securely erase your hard drive. I know of two free options: Disk Wipe (https://www.diskwipe.org) and Darik’s Boot and Nuke (DBAN; https://dban.org). DBAN offers several wipe methods:

  • Quick Erase: fills the disk with zeros
  • RCMP TSSIT OPS-II: 8-pass write of random 0s and 1s
  • DoD Short: 1 pass with all 0s, 1 pass with all 1s, and 1 pass with random 0s and 1s (3 passes total)
  • DoD 5220.22-M: 7-pass version of DoD Short
  • Gutmann Wipe: 35-pass wipe described here
  • PRNG Stream: overwrite with a stream from the Pseudo Random Number Generator, with as many passes as you specify

ADDITIONAL CONSIDERATIONS

Do not attempt to wipe a solid state drive (SSD). Not only would it add to the wear and tear of your SSD, it is also not possible to securely erase a SSD because of the way SSDs work. Namely, many SSDs use a technology called wear leveling to prevent any given part of the drive from being overwritten too many times.

One alternative to secure erasure would be to simply encrypt the hard drive. Maybe I’ll discuss this topic in a future post.

Another alternative to secure erasure is to physically destroy the hard drive, making sure to incapacitate the platters inside the drive. While a hammer would probably suffice, I’m sure you can find ways to get creative with other tools, weapons, firearms, artillery, explosives, etc. Just keep it legal, OK?

Monday, August 10, 2020

Catastrophic Hard Drive Failure

Last night my Late 2012 27-inch iMac experienced a catastrophic hard drive failure. In the minutes leading up the event, I was stitching together some photos which resulted in my iMac running out of memory. I assume that the virtual memory system kicked in, as my computer immediately became slow to respond, and I could hear busier-than-normal hard drive whirring noises. After force-quitting the photo stitching application, my iMac regained normal responsiveness. Abandoning the thought of using my photo stitching application, I proceeded to check my Facebook stream on Safari. A few minutes later, I heard loud “scratching” noises coming from my hard drive, so I quit Safari and attempted to reboot. Unfortunately the iMac refused to reboot, shut down, or obey any other commands. I had no choice but to force a shutdown by pressing and holding the power button. I waited a minute and restarted my iMac. I heard one more loud scratching noise from the hard drive, and then the machine went silent.

Fortunately I have a portable external hard drive where I’ve installed macOS High Sierra (version 10.13).

By pressing the “option” key during startup, I was able to select my external hard drive as the boot volume and successfully launch Finder. I was immediately shown the following message:

I assumed that this was in reference to my internal hard drive. Not a good sign. At this point, I ran Disk Utility to try to repair the volume so that I could mount the internal hard drive and access its files. Here’s what I saw:

Another bad sign. Disk Utility said that my internal hard drive (ST3000DM001 Media) was “Uninitialized” and that its capacity was 4.14 GB when in reality it is a 3 TB fusion drive (note the SSD portion as indicated by “APFS Physical Store”). First Aid failed to repair either the hard drive or the SSD.

Next I launched TechTool Pro and ran a suite of diagnostics. The hardware tests passed for the most part, until it got to the Surface Scan where every single block was designated a bad block.

My original plan was to mount the volume, perform a 1-pass secure erase, and install a fresh new operating system. However, given that I cannot mount my internal hard drive, I have decided to format one of my spare external hard drives, install a fresh new operating system on it, and run the iMac from the external drive for the time being.

I realize that I could replace the internal hard drive, and while it appears to be rather affordable if you buy the parts and install it yourself, I have a fusion drive so I wasn’t sure if I should attempt the replacement on my own. I asked Google but didn’t find any articles about how to replace a fusion drive with a regular hard drive. I suspect that it is possible, but I would not be surprised if the procedure was slightly different. Also, I prefer not to purchase another Intel Mac just as Apple begins its transition to its own Silicon processors. So meanwhile, assuming nothing unexpected happens, I’ll be using a temporary external hard drive for my iMac boot volume, in hopes that this makeshift configuration will buy me enough time to get a new Silicon iMac.

Wednesday, August 5, 2020

Vote By Mail


According to USA.gov, every state offers mail-in absentee voting, but some allow you to take part only in certain circumstances. Some states require an excuse for voting by mail. Due to the coronavirus, some states are giving all voters an excuse to vote by mail for certain elections, and your state may automatically send you an absentee ballot or a form to fill out to request one. Visit Vote.org to get your absentee ballot.

Due to the COVID-19 pandemic, California temporarily shifted to all-mail voting and was the first state in the U.S. to make this change. Ballots will be mailed to all 20.6 million voters for the general election on November 3, 2020.

If you live in California, you might find some of these links to be helpful.
- Register to vote at https://registertovote.ca.gov
- Verify your voter registration at https://www.lavote.net/vrstatus (Los Angeles only)
- Check your address of record at https://voterstatus.sos.ca.gov

If you aren’t registered and want to receive a mail-in ballot, remember to register by October 19, 2020.

Tuesday, August 4, 2020

Google Plus Class Action Settlement


I received notice today of another class action settlement, this time from Google. In summary, “Google operated the Google+ social media platform for consumers from June 2011 to April 2019. In 2018, Google announced that the Google+ platform had experienced software bugs between 2015 and 2018, which allowed app developers to access certain Google+ profile field information in an unintended manner. Plaintiffs Matthew Matic, Zak Harris, Charles Olson, and Eileen M. Pinkowski thereafter filed this lawsuit asserting various legal claims on behalf of a putative class of Google+ users who were allegedly harmed by the software bugs (“Class”). Google denies Plaintiffs’ allegations, denies any wrongdoing and any liability whatsoever, and believes that no Class Members, including the Plaintiffs, have sustained any damages or injuries due to the software bugs.”

The settlement agreement is available here, and information about how to submit a claim form is available at www.GooglePlusDataLitigation.com.

Initially I had difficulty understanding the eligibility rules for submitting a claim, as it wasn’t presented to me in language that I could understand until I actually opened the claim form. Here are the criteria:


A detailed list of Google+ profile fields is available here. Personally I don’t feel that I met the criteria so chose not to submit a claim form, but I hope it helps in case you’re wondering if you should submit one for yourself.