When driving locally in southern California, my main concern is about traffic conditions, so I use a variety of GPS applications including Waze, Apple Maps, and others. However, when planning trips of longer distances or through mountainous areas, it can be helpful to have real-time information about road closures and other hazards to avoid unfortunate situations like this.
For decades, I’ve relied on Caltrans for highway information, and it can be accessed via phone by dialing 511. I just learned that there are now dedicated websites for different regions of California, including Bay Area, Inland Empire, Kern, Sacramento, San Diego, Santa Cruz, and Southern California (http://SoCal511.com/ which redirects to https://go511.com/).
According to the website, “Southern California 511 is a free traveler information service that provides live traffic reports, transit planning, commuter service information, motorist aid, or FasTrak information in the Southern California area through a toll-free phone number, website, and mobile application. Call 511, visit Go511.com, or download the Go511 mobile app to retrieve all the information for your traveling needs. 511 will help improve your commute and keep you informed before leaving the house and while on the go.” Here is an example of the current alerts if we were to drive from Los Angeles to Las Vegas:
In addition to maps for personal vehicles, Southern California 511 also provides trip planning information for public transit and bicycling. Finally, check out the Southern California 511 feed on X. Their handle is @Go511. Safe travels!
I was fortunate enough to experience the 2024 Total Solar Eclipse from Carmel, Indiana. While I was able to view the eclipse through my eclipse glasses, I also brought various recording devices to capture my surroundings from multiple perspectives. This blog entry provides some information about my setup.
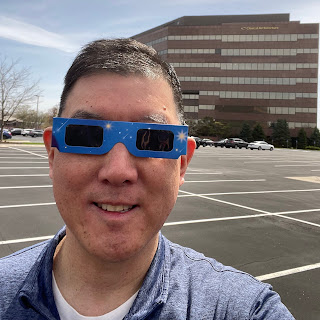
Location, Location, Location. The first consideration, aside from being in the path of totality, was to determine the exact location from where I’d view the eclipse. I decided that in addition to directly recording the sun itself, it would be interesting to record the office building where I work—right before, during, and right after totality. From the parking lot (pictured above), I was able to get a good angle of the building, free from obstruction, as well as an unobstructed view of the sun.
Timing. For most people, an approximate time for the start and end or totality would suffice. Most eclipse viewers simply need to arrive before totality and might snap a few photos and videos to commemorate the event. I was slightly more constrained because I needed to ensure that I had sufficient storage space on my memory cards as well as battery life to capture my intended footage. To determine the precise start and end of the partial and total eclipse, I used the US Navy Solar Eclipse Computer. I grabbed GPS coordinates from Google Maps and entered them into the Solar Eclipse Computer but had to truncate them after 4 decimal places. I made sure to arrive shortly after the beginning of the partial eclipse which would give me an hour to get situated, look around, and set up all my equipment to prepare for totality.
GoPro. One of my recording devices was my GoPro HERO7 Black which I simply affixed to a 3D printed mount and placed on the hood of my rental car since it was one of the only objects above ground level. The purpose of the GoPro was to record a video of the office building and produce a timelapse video immediately before, during, and immediately after the 3.5 minutes of totality. I wasn’t able to attach the mount to anything, and despite there being a slight breeze, I was fairly confident that it would not move around during recording. Given my familiarity with my GoPro’s battery life, I began recording about 10 minutes before the onset of totality, as I was confident that I’d have more than enough RAM and battery life to capture all of totality and several minutes afterward.
Drone. My 2nd recording device was a DJI Mavic Mini. Its purpose was also to obtain a timelapse of the building but from a higher perspective. Approximately 7 or 8 minutes before totality, I flew the drone to 18 meters (59 feet) altitude, according to the flight data, and started recording. I simply allowed the drone to hover for the entire duration. While the drone stayed put for the most part, the 10x timelapse shows what looks like noticeable movement of the drone in all 3 axes which gave the building a “rubbery” appearance. I don’t know how much of this movement was due to the wind. In any case, I was happy with my timing, as the battery lasted through totality and plenty of time thereafter.
Camcorder. My 3rd recording device was a Canon VIXIA HF M301 camcorder with 15x optical zoom capabilities. Along with my eclipse glasses came a camera filter which was probably intended to be used with mobile phones, but the diameter of the filter was sufficient to cover the entirety of the camcorder lens. I used 2 pieces of clear tape to attach the filter to the camcorder so that it fully covered lens. I mounted the camcorder to a portable tripod and placed the tripod on a folding chair, mainly for the purpose of elevating it off the pavement of the parking lot so it was easier for me to make adjustments. Given that I had zoomed all the way to 15x, I discovered that I was only able to capture the sun for a few minutes at a time before it moved off frame. Therefore, I had to keep repositioning the camcorder before, during, and after totality. This meant that I was unable to capture a continuous uninterrupted video of the eclipse. Maybe next time I’ll consider investing in a solar photography tracking mount, but I was mostly satisfied with the results that I got without one. I noticed that when the sun was closer to the edges of the frame, the camcorder had difficulty auto-focusing on the sun, but that was not surprising.
The one obvious missing recording device was my Canon R6 full frame mirrorless camera which I alluded to here. I expected to have my hands full with all the recording devices above, and the addition of my R6 camera and another tripod would have added significantly to my luggage. Therefore, I made the difficult but practical decision to leave it at home. Maybe I’ll bring my “big” camera to a future solar eclipse. Overall, I was happy with the amount of planning that I put into this momentous occasion, and I was blessed with fairly clear skies and good weather, all of which amounted to an unforgettable event. You can enjoy my eclipse video here and below:
If you’ve visited a U.S. national park and hiked any of its spectacular trails, you may have been given advice to wear weather-appropriate attire, use activity-appropriate footwear, bring sufficient food and water, travel in groups (or let someone know your plan if hiking alone), and various other helpful recommendations. However, we sometimes overlook one of the most important aspects of visiting national parks: getting there.
Although most people have cell phones with map applications (e.g., Apple Maps, Google Maps, Waze), we may be lulled into a false sense of security that those mobile map applications will get us to our destinations. In the absence of cellular service, those map applications may fail to work. That is why I recommend bringing a dedicated GPS device. I’ve used a trusty Garmin nüvi 650 for decades, and because it relies of line-of-sight communication with GPS satellites, it always works—even when my phone has lost cellular service.
Additionally, whether you use a phone-based or dedicated GPS, I recommend verifying ahead of time that named locations on your GPS device accurately represent your intended destination. For example, depending on the application you are using, if you select “XYZ National Park” it might pinpoint the geographic center of the national park which might be in the middle of the wilderness, or it might pinpoint one of several park entrances which may or may not be the entrance that you had planned to use. While visitor centers may often have named locations that are geographically accurate, campgrounds, trailheads, and parking lots may be less likely to have named locations.
If there are no named locations that match your desired destination, then I recommend finding its GPS coordinates. Some National Park Service websites like this one and that one will provide you with GPS coordinates for common destinations. If you are not given GPS coordinates, then I recommend using Google Maps to locate your destination on a map and grabbing its GPS coordinates. On a desktop or laptop browser, simply single-click on a location on the map, and Google Maps will tell you its GPS coordinates.
Tip: if you are given GPS coordinates in degrees/minutes/seconds, it may be helpful to convert them to decimal degrees for ease of entry into your GPS. Read my blog post about converting GPS coordinates for more info.
Finally, if you found GPS coordinates, don’t stop there. In addition to writing them down and bringing them with you on your trip, enter them into your GPS ahead of time and verify that it is really your intended destination. Don’t wait until you are actually driving to try to figure out how to enter coordinates into your GPS device. Plus, once you’ve entered the GPS coordinates, it is likely that they will remain in your “recently used” list which might make them more easily accessible when you actually need them.
So in summary, when navigating your way to and within national parks, I recommend 3 things to increase your chances of successfully navigating to your destination:
Bring a dedicated GPS device
Obtain GPS coordinates if named locations are unavailable
Enter and verify destinations in your GPS
With these tips in mind, hopefully you will spend less time getting to your destination and more time exploring our protected lands.
If you’ve used a global position system (GPS) device or an online map application, you may have noticed that geographic locations on earth can be precisely described using latitude and longitude values. Latitudes range from -90 to +90 degrees, where -90 degrees is the South Pole, 0 degrees is the equator, and +90 degrees is the North Pole. Longitudes range from -180 to +180 degrees, where 0 degrees longitude is the Prime Meridian on which the Royal Observatory sits in Greenwich, England.
You may have also noticed that there are 2 main systems for the communication of latitude and longitude: degrees/minutes/seconds (DMS, a.k.a. “sexagesimal degrees”) and decimal degrees (DD). In DMS notation, each degree is divided into 60 minutes, and each minute is divided into 60 seconds, just like a clock. Fractions of sections can be represented by decimals. In DD notation, the latitude and longitude coordinates are simply expressed as decimals, with a greater number of decimal places conferring greater geographic precision.
To complicate matters, in both DMS and DD notations, locations relative to the equator and Prime Meridian can be expressed using either positive/negative values or north (N), east (E), south (S), and west (W) designations. Positive latitudes are N of the equator, while negative latitudes are S of the equator. Positive longitudes are E of the Prime Meridian, while negative longitudes are W of the Prime Meridian.
There may be times when you may need to interconvert between DMS and DD notations. For example, if you need to navigate to a certain location and are provided with DMS coordinates, it may be easier (or possibly your only option) to enter DD coordinates into your GPS device. A free DMS-DD converter is provided by the Federal Communications Commission, and there are numerous other free options available.
Given concern for safety on ride sharing services, Uber introduced Follow My Ride so that passengers and drivers can let other people know where they are. Sharing one’s ride details is pretty simple. During a ride, simply tap the option to share your ride or navigate to the blue shield to open the Safety Toolkit. After selecting your recipient(s) from your contact list, they will each receive a text notification like this:
Clicking on the link takes the user to an Uber website where the passenger’s origin, destination, and current location are shown in real time:
Other Uber safety features are described at https://www.uber.com/us/en/safety/. I have never felt concern for my safety while riding Uber, but I will encourage my wife to use this feature when she rides Uber.
On December 26, 2019, our family attempted to drive from Los Angeles to Las Vegas via Interstate 15 which is the shortest distance and requires driving over 2 mountain ranges. We are very familiar with the drive because we’ve done it so many times. Shortly after leaving Los Angeles County, we connect with I-15 North and soon begin the climb up the Cajon Pass which is situated between the San Bernardino Mountains and the San Gabriel Mountains and has a peak elevation of 3,776 feet. After clearing the Cajon Pass, I-15 North winds through Hesperia, Victorville, Barstow, and Baker. The second major climb along I-15 North takes us over Mountain Pass which in a desert region about 15 miles from the Nevada border and has a peak elevation of 4,730 feet. After that, it’s the final stretch to Primm and then Las Vegas. See the following illustration for an overview of the route.
Here are closeups of Cajon Pass and Mountain Pass (click any image to enlarge):
There were a number of factors that led to tactical errors on the day of our fateful journey. First, we felt comfortable navigating to and from Las Vegas as described above. Second, we heard that there may be snow in the mountains, but we assumed that it would be at higher elevations where people go to ski. Third, and this is the main point of the blog, we blindly and faithfully followed our GPS. To make a long story short, we got trapped between the Cajon Pass and Mountain Pass due to snowstorms and icy roads resulting in closure of I-15. Because many other motorists were also trapped, there were no hotel vacancies so we spent the night in our cars. For more of the gory details, see this video:
Let me focus on a sequence of events that contributed to us getting a bad recommendation from our GPS (Waze). First, we knew there were on-and-off closures of I-15 that day. In fact, our first attempt to traverse the Cajon Pass was thwarted by a road closure. We decided to drive home, but at 2:21 PM, I-15 North was re-opened.
Stubbornly, we decided to make a second attempt. After all, we had reservations for our hotel and a show. Caltrans laid gravel on the road to improve traction, and we got over the Cajon Pass without incident. As of 2:55 PM, I-15 at Mountain Pass was open, but we were still a couple hours away from Mountain Pass.
Snow continued falling, the temperature kept dropping, and Mountain Pass was closed in both directions at 4:00 PM.
Meanwhile, Waze was recommending that we continue on I-15 North and did NOT force us onto a viable alternate route. This screenshot is from 4:04 PM, but Waze kept making the same recommendation for the next several hours.
Mountain Pass was not re-opened until the next morning after it had stopped snowing. This meant that motorists had to either stay on I-15 in a standstill, take an alternate route through open roads, or retire for the evening. We chose the latter, which meant spending the night in our cars.
I’d like to emphasize that this is not so much a criticism of Waze which I think is a really fantastic GPS application. It is more of a reminder for all of us to use technology as an aid but not to be fully dependent on it without thinking things through. Technology may have limitations, and it appears that even though Caltrans was tweeting updates about road closures, perhaps that information was not made available to Waze in a timely manner. In any case, it can be helpful to check multiple sources of information about traffic, road conditions, weather reports, etc. to get you to your final destination in the quickest and safest manner. Sometimes that means you have to outsmart your GPS.
The other day I was planning a trip on Waze and wanted to see if Waze understood the coordinates for my destination in another state. Interestingly, I received the following response after looking up and selecting my destination:
Although it is unlikely that someone would drive 1,000 miles in a single trip, even my Garmin nüvi 650 GPS (which I purchased in December 2007) allows me to calculate routes in excess of 1,000 miles.
There are 2 main reasons why I'd want to program destinations that are so far away, even if I do not plan to immediate drive there. First, I like to plan my route and compare GPS recommendations from different sources (e.g., Waze, Apple Maps, Google Maps). There have been rare instances in which I receive very different recommendations for routes and estimated drive times across different GPS providers. Second, I like to pre-program my destinations into Waze so that when it comes time to drive, they are in my recently used items list. On rare occasions, in the absence of an internet connection, I am unable to program my destination because Waze cannot look up the coordinates--this is when it is very helpful to have my destination saved ahead of time.
I should note that even though Waze was unable to provide me with turn-by-turn route guidance, it did in fact save my selected destination under my recently used items, so I assume that when I am within 1,000 miles of my destination, I can simply tap and go.
I'm a big fan of GPS navigation apps like Waze and others. One thing I've noticed in the Los Angeles area is that although Waze theoretically calculates the fastest route between 2 points, it sometimes fails to account for the degree of difficulty. For example, I am sometimes given routes where I am taken onto a small street and then expected to cross or turn left onto a busy 8-lane road during rush hour. While directions work well at a macro level (e.g., take freeway X, not freeway Y), when it comes to surface streets, sometimes you have to outsmart your GPS.
Today I saw an interesting Twitter moment that highlighted another limitation of most GPS apps: it fails to account for the steepness of streets. I was surprised to learn that some streets have grades in excess of 30%. For example, Baxter Street in Los Angeles has a 32% grade:
That's pretty steep, and unsuspecting drivers who are routed through such streets are sometimes in for a big surprise, if not a mishap. I am sure the makers of GPS apps have been thinking about this for a long time, but it would be nice if a driver could choose to avoid “difficult” situations, similar how there are features to avoid tolls or freeways. Even better, a user could select what kinds of difficult situations they wish to avoid: crossing difficult intersections, driving on steep grades (perhaps with options to avoid streets with grades more than a certain % threshold), driving on partially paved or unpaved roads, etc.
Overall it's pretty amazing how much we've progressed since the days of paper maps, and I often wonder how I found my way around without GPS technology. I realize that someday driverless cars will be the norm which will render this post obsolete, but progress occurs in steps. I hope we will see options to avoid difficult situations in the near future.
Lately I've been doing a little more running than usual, so I've taken greater interest in Apple's iOS Activity App. Since I often run the same route, I've measured the distance on Google Maps and have found the Activity app to be highly accurate in terms of estimating distances.
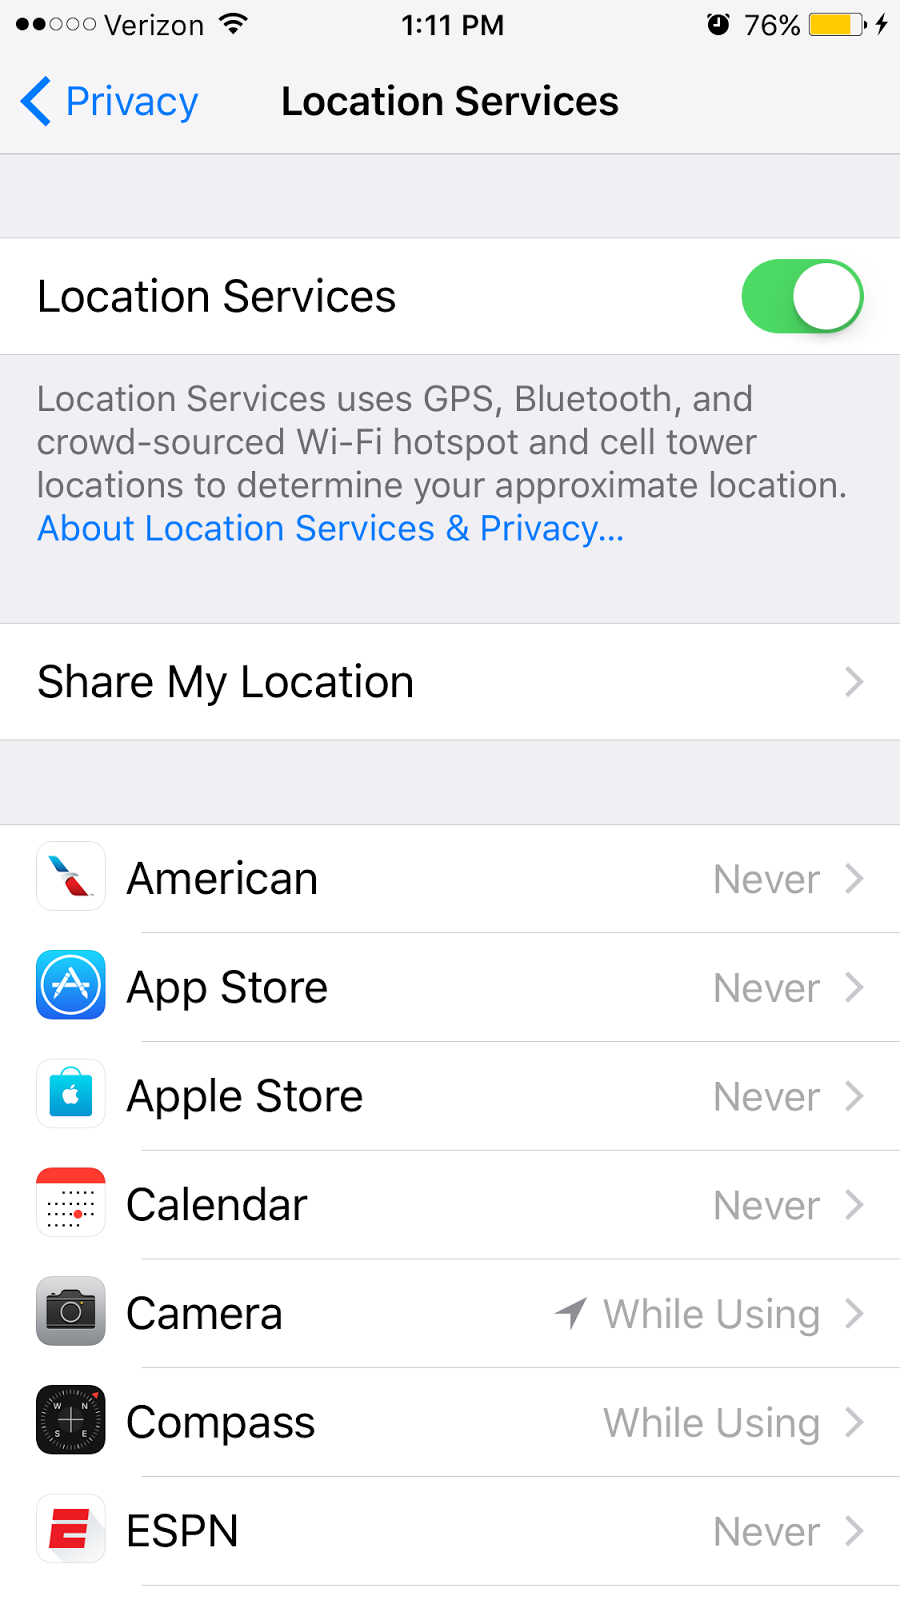
I wonder if distance is estimated using data from its built-in accelerometers and gyroscopes alone or if GPS data is also used to optimize precision. To investigate, I checked my Location Services settings. There is an option to toggle Location Services on/off globally, or one can globally enable Location Services but toggle it on/off for each individual app. I discovered that the Activity app is entirely missing from the list of apps:
So does that mean Activity does not use GPS at all? Inquiring minds want to know.
2017-07-24 UPDATE: Today I turned off Location Services, so in theory the Activity app should NOT be able to leverage GPS, Bluetooth, or Wi-Fi to approximate my location while running. I then ran my usual 3-mile route, and the Activity app seemed to be just as accurate in estimating distance (walking + running distance: 0.3 miles before my run, 3.3 miles after my run), presumably from the accelerometer and gyroscope data.
We recently bought a Mercedes-Benz 2015 C300 for my wife, and I am generally pleased with the performance of the vehicle. However, I am very disappointed with the navigation system which is one of the major features in the "320 Multimedia Package" that was priced at an additional $2,690. The navigation system is laughably horrible to use.
For starters, the user interface is based on voice input and a scroll wheel, so touch gestures and typing are unavailable. That in and of itself would not be hugely problematic if they could only get creative with the way drivers input information, but that is where the comedy begins. It is virtually impossible to jump straight to a point of interest search for destination input. As an example, if you just say "McDonald's" (after all, the presence of a McDonald's validates the existence of a city, doesn't it?) it will choke--instead, you are required to enter a physical address. Well what if I don't know the physical address? All the popular map applications (eg, Google Maps, Apple Maps, Waze) let me search for a point of interest without knowing the physical address. Major fail.
I later discovered that there is a point of interest search, but it too has its limitations, but this time in terms of map data comprehensiveness. I searched for my daughter's school, but the only entry it could find was a school of the exact same name but in a city that was hundreds of miles away. Given that it was a brand new car (and therefore should have a relatively recent map version installed) and given that my daughter's school has been around for a very long time, and given that all the other popular map applications that I listed above know where my daughter's school is, the Mercedes-Benz navigation fails again.
So finally, I look up the physical address of my daughter's school, painstakingly enter the information via voice command, and I try to save the address for future reference and easy access. Rather than let me save the entry with a voice-inputted name and perhaps an assigned numerical ID that I can later scroll to and select or say a number command, the navigation system asks me to speak the name of the entry. On the positive side, it asks me to repeat the phrase with the same intonation to make sure it properly stores my digital voice signature so that I can ask for it again by the same name. On the negative side, I had to repeat it several times because there were slight variations in how I spoke the name, and it did not accept those names as equivalent voice commands. I wonder how likely I am to replicate my voice signature for that destination entry to be able to successfully recall the destination on a different day? And while I haven't tested it, I suspect that if I fail to replicate my own spoken destination just a few seconds apart, I highly doubt that my wife will be able to retrieve the same stored destination using her voice command.
In conclusion, if you are considering the 320 Multimedia Package to get the navigation feature, I would recommend that you seriously reconsider. If you have a smartphone, you already have access to a wide variety of free turn-by-turn navigation applications that are far superior to the Mercedes-Benz navigation in terms of usability and map data accuracy. I do like the 8.4" color display that comes with the navigation package, but unfortunately the display does nothing to compensate for a completely useless navigation system. If I've just saved you some money, please comment below!
If you've ever explored your options for turn-by-turn GPS navigation options on mobile devices, you've probably heard of Waze, a GPS application featuring community contributions such as alerts (e.g., for road hazards, accidents, or police) and community-editing features (e.g., maps and gas prices). I really liked the concept of Waze since many of these features are not present in Apple Maps or Google Maps. I'm not sure if Apple or Google have this feature, but one thing that pleasantly surprised me was the on-the-fly ETA change feature as depicted below.
However, as cool as all the Waze features are, for the last several months I've been getting a lot of Routing Server Timeout error messages:
I am not entirely certain, but I don't think they are due to poor cellular coverage since I've gotten these Routing Server Timeout messages while still being able to retrieve email (as a passenger, of course!), although I can't say that I've verified that in every instance.
In any case, I get these error messages about once every 2-3 times I try to use Waze. That clearly violates the "Bad is Stronger than Good" 5-to-1 Rule and is enough to make me want to consider other options for turn-by-turn GPS apps on iOS. Any recommendations?